Welcome!

Thanks for visiting my blog. Hope you find some helpful hints for organizing your time and space. My passions are to help you make home a refuge instead of a crisis center, and to help you function in peace rather than chaos - at home or at work. I have switched my main blog to 1-2-3 ... Get Organized on WordPress, so please visit me there.


Showing posts with label Crafts. Show all posts

Wednesday, July 18, 2012

10 Green Organizing Solutions for Crafts


Craft supplies are messy aren't they? Becky Striepe of Crafting a Green World has compiled ten Do-It-Yourself Craft Organizer Projects, each with instructions and pictures. Great ways to upcycle, too!  

"Organizing your crafty space can make crafting so much easier, can’t it? I can’t tell you how many times I’ve had to delay a project because I couldn’t find that vintage button that I knew was somewhere or the pretty wrapping paper I’d salvaged over the holidays and stashed – well, someplace! Where is it again?
 
messy craft table - upcycled craft organizers to the rescue!

No matter what your craft, chances are your space could use a little more organizational oomph, but organizers from the big box store come with a big impact. They’re often made with plastic and shipped all over the world. Boo on that! We craft green, and we want our spaces to be green too, right? Instead of heading to the store, check out these upcycled organizers for your craft room instead!

1. Show Caddy Organizer – Got an old shower caddy that’s past its prime? Give it a little scrub, paint it with some low-VOC spray paint, and you can re-use it for vertical crafty storage.

2. Hangers for Fabric – Raid your closet or the thrift store for those clippy pants hangers. They’re a great solution for storing your large pieces of fabric.

3. Make a Frame Thread Holder – Transform an old thrift store frame into a pretty solution for all of that thread.

4. Chalkboard Sign - Of course, you need to keep your thoughts organized as well. Jot down your important to-do’s on an upcycled chalkboard.

5. Recycled Can Wall Organizer – Arrange clean, salvaged cans into a wall organizers for your crafty knick knacks. They recommend Eco Glue, but I’d go with something stronger like E6000. You don’t want this falling apart on you!

Upcycle Candle Holders into Colorful Organizers6. Upcycled candle holder organizer – keep those teeny items like buttons and paper clips in check by repurposing old candle votives. You could use this same method to adorn thrifted glass ware, if you have bigger items to store.

7. Mason Jar Storage – Reuse some of your old Mason jars along with a thrifted cake or cupcake stand for some small-item storage.

8. Ribbon Storage – Spunky Junky bought hers new, but you can hit the thrift store for a slotted Tupperware bin – or really you could drill holes into any thrifted Tupperware container that’s the right side – and use it to make an upcycled ribbon dispenser.

9. Old Dresser for Fabric – Got a huge stash of fabric? Keep it neat and organized in an old dresser spruced up with a coat of paint.

10. Funnels for Twine – Wrangle those balls of twine with funnels! The ball rests in the top, and you dispense the thread through the bottom. Easy peasy!"

More on craft storage and organizing:

Organizing a Portable Craft Station

Organizing Art or Craft Space


Storage Ideas for Crafts and Art Supplies


Thursday, May 17, 2012

Organizing a Portable Craft Station

           
One of my clients has a bunch of beads which she and her daughter like to use to make jewelry. Since they don't have a dedicated craft room, we decided to go portable. Here's what we came up with:


I found this set of drawers at Staples for about $30, wheels included (which they chose not to use). We sorted like items into each drawer: beads, hardware (clasps, earring stems, etc.), wire and other necklace materials, tools, gift boxes. 


Current projects reside on top until they're finished.  

We used a similar storage unit for art supplies - grouping brushes, paints, small canvases, etc. in the various drawers.

If you don't have a lot of room to store your crafts, go portable!


More on craft storage:

Storage Ideas for Crafts and Art Supplies
Craft Storage
Organizing Art or Craft Space  


Friday, April 1, 2011

Tips from Professional Organizers - Organizing Quilting Supplies

    
More great advice from my fellow professional organizers, this time on organizing quilting supplies...

"I have a serious quilter client ... and she stores all of her 1” square pieces in pizza boxes! She gets them new from a local pizza shop, so they are clean. You can’t see what’s in them, so she has labeled the outside of the box with the color. Because they are flat, they stack neatly, too.Anne Navach, Anne Navach Organizing Services 

"Here are a couple of creative / visual ideas from a blog I like." Linda English


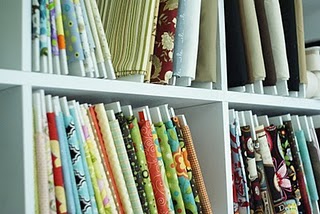
Fabric on Pants Hangers 


DIY Fabric Bolts Using Foam Core

"I am working with a serious quilter too! She has loose fabric, we are putting in clear totes by type (fleece, Amish, etc.) and clearly labeling.
 

She has a lot of kits purchased too, those are going into 2 and 3 gallon ziplocs so she can see what they are, then lined up in large totes too.
Because the area is in a basement – semi-finished – she didn’t want them exposed to air and possibly dust.
 

And then her in-progress projects will be laid out so she can work on them.
 

Don’t forget a scrap bin, she cuts hers down to send to her mother for her to just stitch together, she is in her 80’s!
 

All of these bins are going on open shelving units. It was like Christmas for her in finding all the great things she can work on!" Jordana

"I had a client who had an entire room in her basement created for her quilting. She purchased the table in the photo  .... 


She also had tall cabinets installed where she stored many of her quilting needs. 

The drawers in the table worked well for smaller fabrics wrapped around cardboard that were stacked on end (grouping by colors). 

We used the same technique with the larger fabrics and stored them in the wall cabinets, much like you would see in a fabric store. 

The drawers also worked well for patterns and other tools. The large cabinet also holds clear bins with smaller fabric scraps." Yve  

"Those clear plastic zip-close bags in which new pillows and blankets come make good containers for individual projects.  So, when she buys (or inherits!) a group of fabrics for one specific project, she can store each project unto itself until she is ready to begin that project." Maureen DeGarmo

"One quilter that I knew had a wall of square cubicles in her sewing room - floor to ceiling --  painted white. She kept her fabric, coordinated by color, in the cubicles. I think they were around 1' square -- possibly larger. It was practical, colorful, and attractive." Judy Ott


A plethora of ideas for solving the same problem! Aren't these ladies great?


More on crafts:

Storage Ideas for Crafts and Art Supplies

Craft Storage

Organizing Art or Craft Space   


Friday, December 10, 2010

Organizing Gift-Making Stations

          
As I've already mentioned in other posts, we give our four foster daughters a little gift in their stockings each morning. One morning their gift was a paper mache ornament that they could paint, glitter glue, etc. 

To make it easy for them, I set up a station with all the supplies they'd need to decorate their ornaments - paint, glitter glue, paint brushes, paper cups for water, etc. And I covered the table with a plastic table cloth from the dollar store to make clean up easy. I also put out a container of other wooden and paper mache items they could decorate for gifts, if they were so inspired.


I set up another table with beads and and jewelry supplies so they could make jewelry for their friends and family should they choose to do so. I made a couple of sample Christmas earrings to give them ideas.


I also set up our Christmas cookie decorating supplies in the same way when we made Christmas cookies and decorated a gingerbread house. All the possibilities were at hand so their creativity could be unlimited! :)


By getting things ready ahead of time, everything is in plain sight so everyone knows what is available. It also saves people rummaging through drawers trying to find what they need. 


More on gift-making:

Storage Ideas for Crafts and Art Supplies

Saving Time by Cutting Out Craft Clean Up

Easy Decadent Fudge Recipe


Friday, May 14, 2010

Organizing Stitchery Supplies

      
DMC Threads has been having several guest bloggers describe how they organize their stitching supplies. If you're a stitcher, you might enjoy the insights and ideas these women offer.

More on crafts:

Storage Ideas for Crafts and Art Supplies

Organizing Art or Craft Space

Saving Time by Cutting Out Craft Clean Up


Tuesday, February 23, 2010

80 Awesome Ideas for All Your Old or Unwanted Books from Online Colleges


It's wonderful to be home again - and it's so quiet! LOL Let's talk about books ...


Once again Online Colleges has provided us with an amazing list of great ideas - this time, uses for old and unwanted books:

"Maybe the semester has passed and you forgot to sell back your text books, or perhaps you just held on to too many books over the years and now you need to figure out what to do with all of them. You don’t want to throw them away, so what is left to do with them all? Here are 80 awesome ideas that will have you realizing that books aren’t just for
education.

Around the House

Use your old books around the house in creative ways with these ideas.

  1. Step aerobics. Don’t buy expensive equipment to do step aerobics at home. Use old books instead. Tape or cover them in fabric to keep them in place.
  2. Yoga block. Use a book or two as a yoga block.
  3. Coasters. Use small books as coasters for drinks. If you have a set, such as from a children’s book series, you can have a matching set of coasters for an eye-catching statement.
  4. Kneeling pad. Put some padding on an old book and tape it or wrap it in fabric to make a kneeling pad you can use while gardening.
  5. Table legs. Use a stack of old books to replace a missing table leg rather than throwing both the books and the table away.
  6. Book safe. Cut out the center of old books to hide valuables, such as extra cash or jewelry, in plain sight.
  7. Headboard. Choose the books with the best covers and make a headboard with them.
  8. Door stop. Are your doors never staying open? Use a heavy book to keep it in place.
  9. Step stool. If you have a hard time reaching the top shelves in your kitchen, tape books together to make a handy step stool.
  10. Make cheese. Homemade cheese, like the type used in Indian food, is easy to make. Use an old book to press the cheese after it has drained.
  11. In the freezer. Place pages from old books between foods in the freezer to keep them from freezing together.
  12. Paper towel substitute. Instead of using paper towels for absorbing grease off bacon or fried foods, use pages of a book. They can also be used in the same way to separate baked goods.
  13. Trivets. If you feel like you never have anyplace to safely put those hot pots and pans, try using an old book as a trivet.

Decorate

There’s no need to spend tons of money to decorate your apartment or house when you can reuse old books.

  1. Lamp. Use three books to make this fun lamp.
  2. Picture frame. Using a children’s board book, you can alter it slightly to create a custom-sized double picture frame.
  3. Wall art. Turn eye-catching covers or brightly-colored pages into wall art to decorate your home.
  4. Create art. Check out these art projects done with old books to spark your creativity for your own project.
  5. Make a hymnal angel. If you have an old hymnal lying around, make this stunning hymnal angel.
  6. Tabletop. If you have an old table that could use a facelift, use the pages of a book to decoupage a table top.
  7. Word plates. Use old plates and text cut out of old books to decorate in an unusual way.
  8. Wreath. Make an attractive wreath from an old paperback book.

School and Office

From desks to pen holders to art journals, you’ll find great ways to reuse old books in your office or for school.

  1. Lap desk. Use an old book that is big enough to rest your laptop or papers on for a great, portable lap desk.
  2. Paper weight. Don’t let important papers get lost. Put them under an old book to keep them in place.
  3. Wall book shelf. Make a book shelf on your wall from a few old books.
  4. Book case. If you need more shelves for your books, make a book case out of hardback books like this one.
  5. Book ends. Lay stacks of books at either end of your upright books to keep them from sliding over.
  6. Pen holder. Make a pen holder out of the spine and pages of a phone book or other soft back book.
  7. Art journal. Gesso over the pages and you have an art journal ready to use.
  8. Magazine reader. Take the pages out of a book and recycle them, then slip a magazine into the hardback left behind to have a handy way to hold your magazines.
  9. Desk. If you have tons of books but no desk, then you are in luck. Stack your books and put a piece of wood or an old door on top to make a desk of your own design.
Reuse the Pages

While hardcore book lovers may have a hard time tearing out the pages of any book, for those less faint of heart, use the pages of your old books in these creative ways.

  1. Recycle. Recycle them any place that takes old phone books for recycling. If they are hardback, tear out the pages for recycling, then reuse the covers for some of the great ideas here.
  2. Kindling. Use them as kindling to get your fireplace or camp fire started.
  3. Mulch. Shred them to make a great mulch for your garden or landscaping.
  4. Origami. If you are learning how to do this ancient Japanese art, practice with pages from your unwanted books.
  5. Packing material. If you need to send something through the mail, use the pages for packing material in your box. If your box is too big for the item you are shipping, you might even be able to wedge it between books to keep it from sliding in the box.
  6. Moving. If you have a move in your future, use the old pages to wrap breakable items for packing and moving.
  7. Cat litter. Use shredded pages for cat litter that is easy on the paws and the wallet.
  8. Wrap gifts. If you have small gifts that need wrapping, use a page or two from an old book.

Crafts

Make crafts from unwanted books like the ideas here.

  1. Make an envelope. You will want to have one side blank so you can address the envelope, but you can use pages for making envelopes for personalized notes or cards.
  2. Flowers. Make paper flowers from the pages to create a sweet gift for the book lover in your life.
  3. Basket. Instead of magazine pages, use book pages to weave a paper basket.
  4. Gift tags. Make unique gift tags from comic books or even the regular pages of any book.
  5. Stationary. Use pages of a book as the recycled paper needed here to create your own stationary.
  6. Gift bag. Instead of using expensive gift bags, make your own from book pages when it comes time for gift giving.

For Kids

Teach kids the importance of reusing when you utilize these awesome suggestions.

  1. Booster seat. If you know a toddler who can’t quite reach the dinner table, use big books as a booster seat. If you need to use more than one, tie them together to ensure they don’t slide off or cover the stack in old fabric.
  2. Leaf press. Have kids put leaves inside or under old books for pressed leaf art projects. This also works with flowers.
  3. Paper mache. Let the kids use pages from old books for paper mache projects.
  4. Confetti. Shred the pages of a book to make confetti for cascarones.
  5. Easter basket. Use shredded pages for lining Easter baskets instead of using plastic "grass."
  6. Paperback apple. Help your kids create a cute paperback apple that would make a great decoration for the house or unique teacher’s gift.
  7. Clock. You and your child can make a unique clock from an old children’s book for your child’s room.
  8. Reuse text books. Teachers and homeschool parents can use these great ideas for reusing old text books in resourceful and educational ways.
  9. Paper clay. Use book pages as the recycled paper in this recipe for making paper clay.
  10. Supply box. Cut out the middle of an old book and make an awesome box for the kids to keep their art or school supplies in.

Clothing and Accessories

Find out how to reuse books as clothing and accessories that will definitely turn a few heads.

  1. Paper dress. If you are feeling really creative, read about paper dresses and try your hand at making one.
  2. Brooch. Make a one-of-a-kind brooch from pages of a book and paper mache.
  3. Earrings. Fold a book page into an origami earring that will truly be eye-catching.
  4. Bracelet. Use your book pages and glue you make yourself to create a bracelet.
  5. Jewelry box. After you’ve made your jewelry from an old book, why not use another book to make a jewelry box to keep it in.
  6. Party hat. Make your own party hat from pages in a book. This works best if you have an old coffee table book with larger pages.
  7. Handbag. Use an old book with a cover you really like to create a fun handbag like this or this.
  8. iPod case. Make an iPod case from an old book.

Phone Books

It seems hardly anyone wants those phone books, even if they are current, but these keep showing up on doorsteps everywhere. Here are some great ways to put them to good use.

  1. Clean paint tools. Use the pages from a phone book to clean the paint off your brushes and other painting tools.
  2. Clean your windows. Tear out the pages and use them along with a mixture of vinegar, dish soap, and water to have a great window and glass cleaner.
  3. Gift bows. Cut strips of phone book pages to create fun bows to put on gifts.
  4. Wallet. Using the pages of a phone book and some tape, you can make a wallet in a matter of minutes.
  5. Flip book. Draw on the corners of a phone book to make a flip book.
  6. Coffee table. Check out this creative way to make a phone book coffee table.
  7. Cutting mat. Use a phone book as a cutting mat that will not harm your cutting blade.
  8. Toilet paper. It may not be as soft as what you buy in the store, but this toilet paper alternative sure won’t cost much.
  9. No phone books. Register to be taken off the list for phone book distribution and make sure they never make it in to your house or sign a petition to stop widespread distribution altogether.

Getting Rid of Them

Find lots of creative ways to get rid of your old books without just throwing them away.

  1. Book swap. Have a book swap in your neighborhood to find new ones and get rid of old ones.
  2. Library. Donate your books to the local library when you are finished with them.
  3. Sell on the Internet. It’s easy to sell your books on the Internet, and it might even bring in a little extra cash.
  4. BookCrossing. Give your books away through a fun project like BookCrossing.
  5. Leave them at a coffee shop. Put a little "free" sign next to a stack of books and leave them at your local coffee shop.
  6. Hospital. Give your old books to hospitals. They will give them out to patients.
  7. Trade. Many used book stores will let you trade your old books for different books or for CDs or video games.
  8. Freecycle. Give them away through Freecycle.
  9. Gifts. Give them as gifts to the readers in your life–especially if you have old hardbacks that book collectors might appreciate."

Aren't these amazing ideas?

More on books:
Decluttering Your Books with BookMooch
A Last-Minute Clutterless Gift Idea - BookSwim
Tools to Inventory Your Books

Wednesday, December 23, 2009

Repurposing Your Christmas Cards into a Year-Round Memory


Hate to throw away those picture Christmas cards or encouraging notes, but don't want to add clutter to your home? Adhere them to a large piece of paper collage-style, laminate and you've got a placemat that will bring you smiles throughout the year!

More on Christmas cards:

Buried by Holiday Mail?
Get Oranized Month 2009 - Update Your Addresses

Tuesday, October 13, 2009

Clever Corner Storage


Here's another idea from Better Homes and Gardens - using your corners for efficient organizing or storage. This example is for the bathroom, but it would work in any room where you have an extra corner lurking around and need some cute storage.

"Make use of corner space with a tall pot rack. Fill bowls with bathroom supplies and stacks of rolled bath towels for an attractive and functional display."

You could substitute baskets for the bowls and store whatever you need in that room: sewing items in a craft room, fresh produce in the kitchen, etc.

corner pot rack

Share your ideas!


More on storage:

Finding More Bathroom Storage without Expanding Your Bathroom

Get Organized Month 2009 - #1 Biggest Organizing Mistake

Magnetic Paint - An Innovative Space Saver!


Tuesday, September 22, 2009

Organizing Art or Craft Space


When organizing art or craft space, envision what you want to do in that area. If you have a large area, you can divide the space into functional areas - a space for painting, a space for beadwork, a space for sewing, etc. If your space is small, divide your supplies into like groups.

If you know what will happen in your art/craft area, it is clear what does not belong there. Start by removing everything that should not live in this area. I usually start in one corner of the room and sweep around the room. Simultaneously remove unrelated items, purge unnecessary items, and group like items together.

If you have the luxury of a large space, consider which parts of the room would be most conducive to which functions. Take into consideration storage, work space, lighting, ventilation, etc. You may even want to graph out the room, creating scale model furniture. Then you can move furniture without lifting a finger!

If your space is small, group like supplies together so you don't have to wander all over the space to find what you need.

Don't forget to use vertical space. You may want to put up a pegboard for your glue guns, embossers, pliers, and other tools. Outline each tool with a Sharpie, and you'll know where to return it - as will others who use your tools!

If you have blank walls, put up some shelving to hold supplies or use tall shelving units. By using vertical space, your floor space is less cluttered and you have more room to work.

If you have the need to see your supplies, use glass jars or clear shoe boxes from the dollar store. Stackable bins that are for produce (the kind with the open front) provide visibility yet reduce visible clutter.

I found letter-size plastic baskets at the Dollar Tree yesterday - perfect for storing different kinds of craft or office paper on shelves. A file cabinet or rolling file is also great for storing different types of paper. Plastic stacking drawers that hold a ream of paper in each drawer are available at BJ's or office supply stores. Cereal boxes can be taped to each other (with an end or side removed) for a green alternative. You can cover or paint them to make them more attractive.

Dishpans and similar plastic bins from the dollar store are wonderful containers for keeping similar supplies together. Label them, and slide onto a shelf. Or re-purpose other items for storage - tins, coffee containers, baskets, etc. If you have some keepsakes sitting around in a box that would double as storage containers, see if there are some you can use and enjoy. Just make sure your supplies won't damage them.

Plastic drawers come in all sizes for all sizes of supplies. Silverware or drawer organizers, muffin tins, ice cube trays and small plastic boxes can keep drawers organized.

Use pants hangers with clips to hang stencils or other hangable stuff. 


Pants hangers that have four rods hold ribbon spools beautifully. Or thread ribbon spools onto paper towel/gift wrap tubes. Insert a ribbon through the tube and hang. If the ribbon spools are too small, thread a ribbon or dowel rod through them. Another idea: place ribbon spools in a shoe box and cut slits in the box through which the ribbons can be inserted. Each ribbon is visible and available with a pull! Tie a pair of scissors onto the box and they're always handy.

Use back-of-the door hanging storage, especially if your area must serve double duty. If that is the case, consider using a card table as a work space. It can be folded up when the space is needed for another use. Under-the-bed storage can be used if a bed is in the room.

Allow for clean up time before leaving your art/craft area. Put away supplies. Clean brushes and other items. By taking a few minutes at the end of each creative time, your space is pleasant and inspiring when you return! Visual clutter creates clutter in your mind.

To keep my white plastic craft table clean, I cover it with Glad Press 'n Seal. Clean up involves pulling it off the table! If there are some accidents, Mr. Clean Magic Sponges take care of it.

If you use solvents or other flammable liquids, make sure to have a metal trash can to store soaked cloths until they are cleaned, to avoid possible fire.

Step back and evaluate -
- is the lighting adequate for your work spaces?
- Does everything have a home?
- Is there adequate storage?
- Is your space pleasing to your eye?
- Is the ventilation adequate?
- Are there items you need in order to make your area more functional?

What have you done to make your art/craft area more efficient and functional? Subscribers, click title to comment on the original blog.

More on arts/crafts:

Storage Ideas for Crafts and Art Supplies
Craft Storage
This is What I Call Using Wall Space!

Tuesday, September 8, 2009

Storage Ideas for Crafts and Art Supplies


Terri, one of my blog followers, asked for some help on organizing craft and art supplies. I'll do a couple of blogs on this, and we'll start with storage ideas. The following websites were mentioned on a NAPO (National Association of Professional Organizers) chat. I've chosen some creative storage products from each one.

Craftmates is one of the best organizational storage solutions for small supplies such as brads and buttons. I use these screw on containers for beads - they're easy to remove and put back, unlike flat divided containers with one lid.


Cropper Hopper, has everything from furniture to embellishments, but specializes in flat and embellishment storage. Left to right, first row: Paint and Dabber Holder, Embellishment Bags, Zip 'n Flip Embellishment Bags. Second row: Ribbon Revealer, Small Sticker Bin, 10-Drawer Rolling Cart.


Creativity, Inc., aka Crop in Style, has been around for the past 10 years and has led the way with wheeled totes and paper storage. Left to right: Cube with four inserts (paper storage), Tote to transport paper and tools, Pen caddy.


Fiskars, is great for cutting systems and tool storage. Left to right: Scissor/tool storage, Embossing Organizer, Hobby Holder.

Craft Caddy Protectors (6pk) for Embossing Organizer Hobby Holder™ Tote


Archival Methods, has everything archival for
photo and memorabilia boxes, in addition to long-term album storage. Left to right: Archival Tissue, Snap-Lock Hanging Files for Photos, Slides, Prints and Documents.

ARCHIVAL TISSUEBINDER / FILE HANGERS


Archival Supplies is similar to Archival Methods,
but has a bigger selection of supplies. Left to right: Archival Document Storage Boxes, Vertical Filing System - Wall Rack.

Tan Document Cases Vertical Filing Systems


Two Peas in a Bucket Left to right: Wall Clip Hangers for Paper, Embellishment Organizer.


That gets us started on storage ideas. We'll talk some more about storing and organizing crafts in an upcoming blog. In the meantime, what are your clever ideas on the subject? Subscribers, click the title to comment at the end of the original blog.

More on crafts:
Saving Time by Cutting Out Craft Clean Up
Craft Storage
Organizing Your Ribbon

Tuesday, July 14, 2009

Craft Storage


A few months ago I came across some containers that are perfect for storing small craft items - beads, scrapbooking/card-making items, etc.


They are clear acrylic circular containers that stack and screw onto each other. The advantages:
- you can see all your supplies at a glance
- ease of removing and replacing contents
- compact, consistent storage
- reasonable price.


I bought this set at Hobby Lobby for $6.99. I've heard they are also available at Walmart.


I had previously used flat plastic boxes with multiple compartments. In order to see the contents, you had to open the lid. Removing items like small beads were difficult and even harder to replace. Many times they would fall into the sections next to them.

Some people use a drawer unit designed for nails, screws, and like items. It must be mounted on the wall or placed on a surface. If mounted on the wall, it conserves space, but may not be the look you're going for. Storing it on a table takes up valuable work space.


I store my circular containers horizontally in a drawer. Even though they are a couple of layers deep, it's easy to see what I want at a glance. If you store like items together in the same column, all you have to do is pick up a column and you're ready to go!

I might even decide to use them for storing dried herbs! How about office supplies? OK, I'd better stop.

What do you use to store your craft items? Subscribers click here to comment on the original blog.

Other crafty ideas:
Saving Time by Cutting Out Craft Clean Up
Organizing Your Ribbon


Tuesday, March 3, 2009

Organizing "Messy" Toys


I saw a clever idea on Happy Mama's blog the other day. She stores her kids' "messy" toys (those that have a jillion pieces) in clear plastic tubs in the top of her child's closet. Then her child created a catalog of each tub - a laminated picture of each category held together by an o-ring. You could also label or put pictures on each container as well.

The best part - her child must have all other toys put away before being allowed to get out a "messy" toy container. Because they are stored in the top of the closet, her child must have help to get them down, so mom can inspect. Obviously, as the child gets older, "messy" toys can be put at a reachable level.

I think this system would work with our toys, too - craft items, collections, etc.

Wasn't that a clever idea? If you receive this blog by email and would like to comment, this link will take you to my blog.


Blogs on similar topics:

Get Organized Month 2009 - Family Five Minute Challenge,

Downsizing Toys before Christmas,

The Ultimate in Toy Decluttering!!


Need some help organizing your child's room? Three simple steps: Three Steps to Organizing Your Child's Room.


Wednesday, June 25, 2008

Organizing Your Ribbon

Are you a crafter? Have lots of ribbon? You must check out a blog called Stamp with Shelly (click the title above). The title of the post is "Confessions of a Ribbon Addict."

Shelly has taken drawers of ribbon and organized them on one device that spins. Not only does she hang her ribbon on it, but embroidery thread, stickers, and other items. She has them available and accessible at a glance! And what a space saver!

You have to see it to appreciate it - she has pictures showing the process and the final product.

Monday, June 9, 2008

Saving Time by Cutting Out Craft Clean Up

As you can imagine with teenage foster girls, we do a lot of crafts in the summertime. My organizing business is necessarily minimized so I can spend time with the girls while they are out of school.

This week we are painting terra cotta flower pots. We had to spray a sealer on them before painting. I grabbed my Glad Press 'n Seal and covered my patio table with it before spraying - no clean up!

It's been in the 90s this week, so we brought the flower pots inside to paint. Even though we have a white plastic craft table, I decided to cover that as well so we wouldn't have to be continually wiping up paint. Since we must do several coats, we have just left the Press 'n Seal on the table until our project is finished.

I'm so glad this idea popped into my head - what a time saver!

Do you have similar "light bulb moments" you'd like to share with us? We'd love to hear them!

Friday, May 2, 2008

Organizing Your Fun Time

We received a houseful of four teenage girls yesterday who will stay until next Thursday. They are part of our Shelter Care residential program (my other job) and usually reside with a permanent set of house parents. But once a month they come to our house for a week, as do two other houses of girls.

I try to offer some fun things for us to do together, so I do research. I look at a couple of websites that list activities to do in our area, the website for our park system, current movies, and a craft store that offers classes.

Then I make a list of things we would be willing to take them to, considering both location and price. I also make another list on the same page of things to do around home - crafts, cooking, games, etc.

A third area includes possible exercise options: swimming, working out, walking in the neighborhood or at a track or at a park, frisbee golf, tennis, raquetball, basketball, hikes, etc.

And finally I give an option to go out for coke/coffee with either Bob or me (or both at different times).

I put all this on a list and let each girl vote for her top two or three favorites in each area. For each top choice I give it a numerical value of 5, the second place choice gets a 4, and third place gets a 3. I add up all the votes so we can see what the majority wants to do.

Then I try to schedule in as many activities as our schedule allows and as the weather permits, trying to provide variety. We usually throw in a house project that every one pitches in to do for an hour (washing walls or windows or cars, yard work, etc.). I also try to plan some down time for people to just chill if they want to do so.

Since we have a specific time when we have each house of girls, it lends itself to such a system. But you could institute something similar just to do something different than the normal routine. I know for myself, if I have a routine schedule, I can easily get in my rut, and don't always think about seeing what's out there to shake up my life a little.

This is also a great system to put into place for summer vacation. Tweak it to fit your family's needs and schedules - it makes life interesting and fun!

Thursday, March 6, 2008

I'm in Family Circle Magazine - Organizing Your Scrapbook Materials

Check out the April 1, 2008 edition of Family Circle Magazine, where I'm featured in an article by Lindsey St. Clair on p. 26 about organizing your scrapbook supplies! How fun is that?!

Dreams really do come true!

Tuesday, February 26, 2008

Our February contest winner!

Our February contest winner is Kristi from Maryland! She has a great way to store little things - file stickers, clear tabs for hanging files and the paper inserts, shipping labels, Roladex blank cards, price stickers for garage sales, name stickers for your children's school items, video/cassette labels, craft items, scrapbook embellishsments, etc.

"I get small ziplock bags that are the size of the item I have --- then I get a hole puncher and punch a hole ABOVE the zip area --- then you go to Staples (www.Staples.com) and get those metal ring fasteners --- and put all the baggies on the metal ring-- and then THROW THE WHOLE thing in your drawer.


NOTHING FALLS OUT OR AROUND and when you need those "LITTLE items" you just pull out the metal fastener --- and flip through each bag since they are see-thru, and then open the clip in the right area and take out the bag you want to use ---BINGO!

If you have lots of similar items -- I got a peg board and just slid each baggie grouping on a LONG peg."

Kristi suggests buying baggies online - much less expensive!